Animating seven-segment displays with a web tool
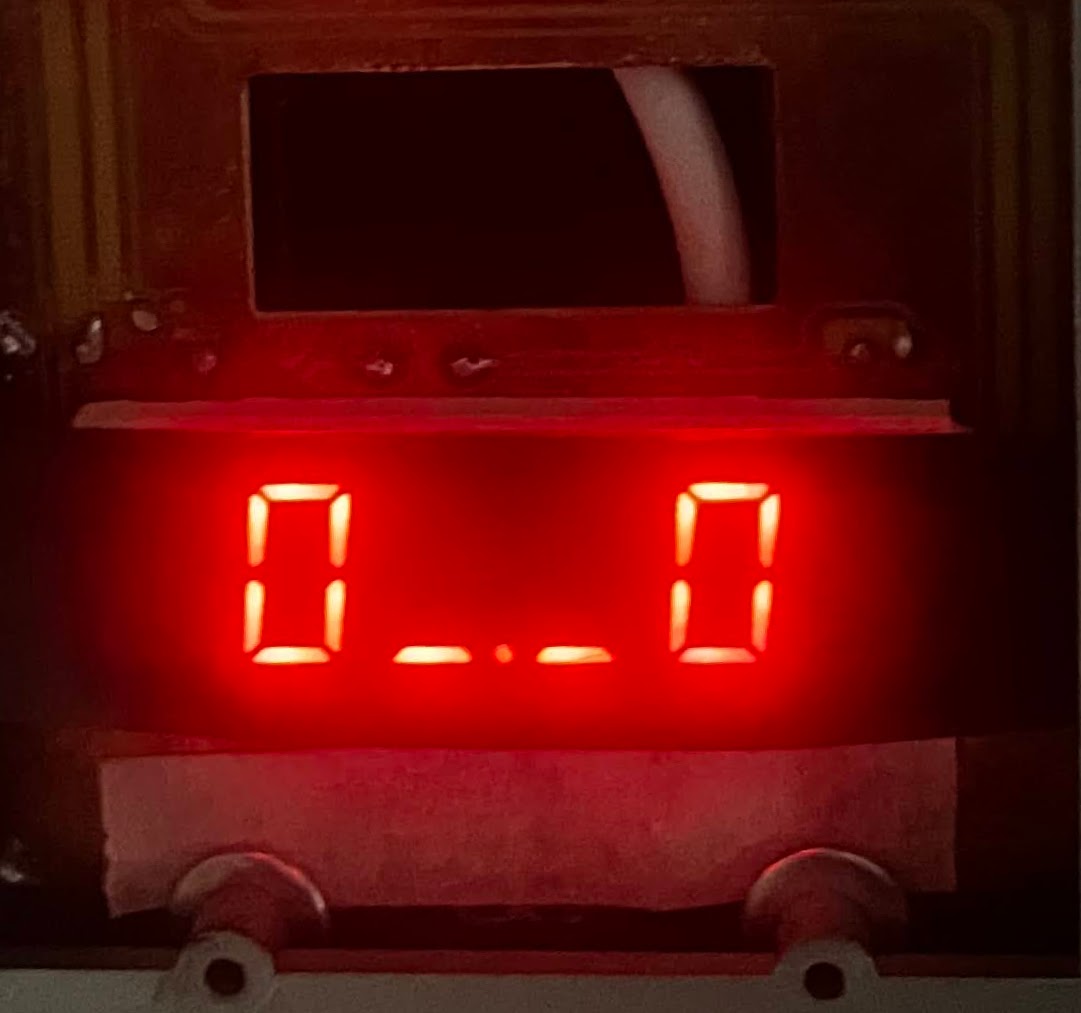
So a friend was building a device which had an array of 6 seven-segment-displays. We were thinking about some cool idle and loading animations we might be able to program into it.
I didn't ask for the specifics but it was clear that the display unit had an arrangement of one shift register (probably a 74HC595) per digit. The 74HC595 is a nice little chip that can be fed one byte serially, and it outputs that byte in parallel. It also latches onto that byte for however long we ask it to, and it can be daisy-chained. So it is a cheap way to drive a huge amount of LED lights with a few micro-controller pins.
He was hand-writing the bytes. Each 1 on the byte turns on some LED, and each 0 turns it off
(0b01001111 or 0x4f to display the digit '3'). I realized I could quickly hack
together some tool to make it easier and more fun to animate.
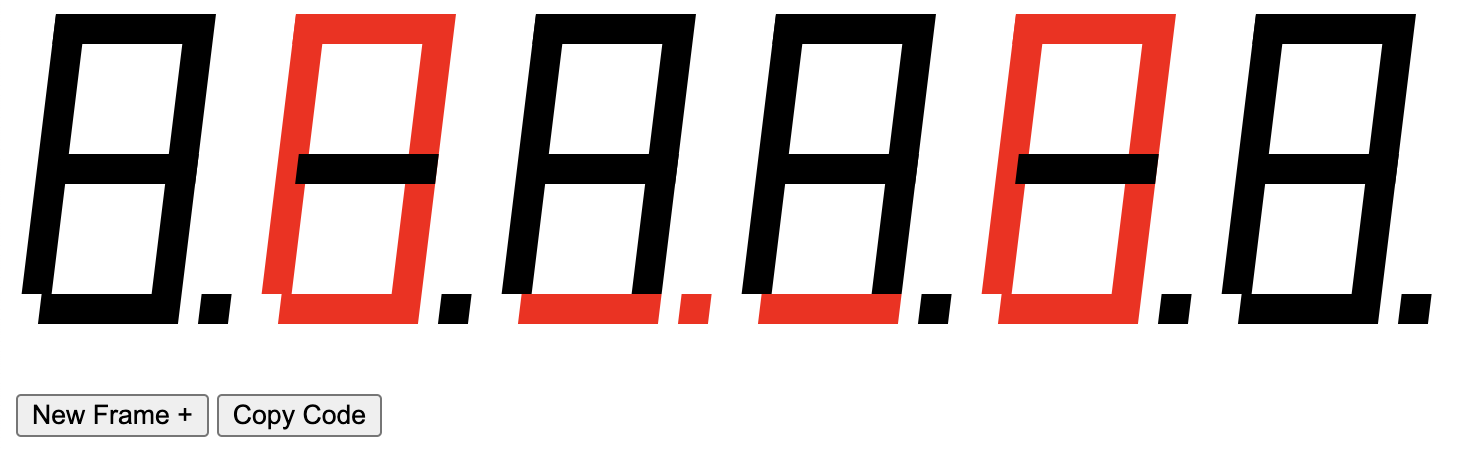
It took me about an hour to write the tool but I polished it up a little for this article.
One Seven Segment display
First I need to display and manipulate a single digit.
The Model
These kinds of systems are best described by some form of Model-View-Presenter separation.
Which is just a fancy way of saying: keep the representation of the LED matrix separate from the visualization of it.
If we assume the display to be labelled like below:
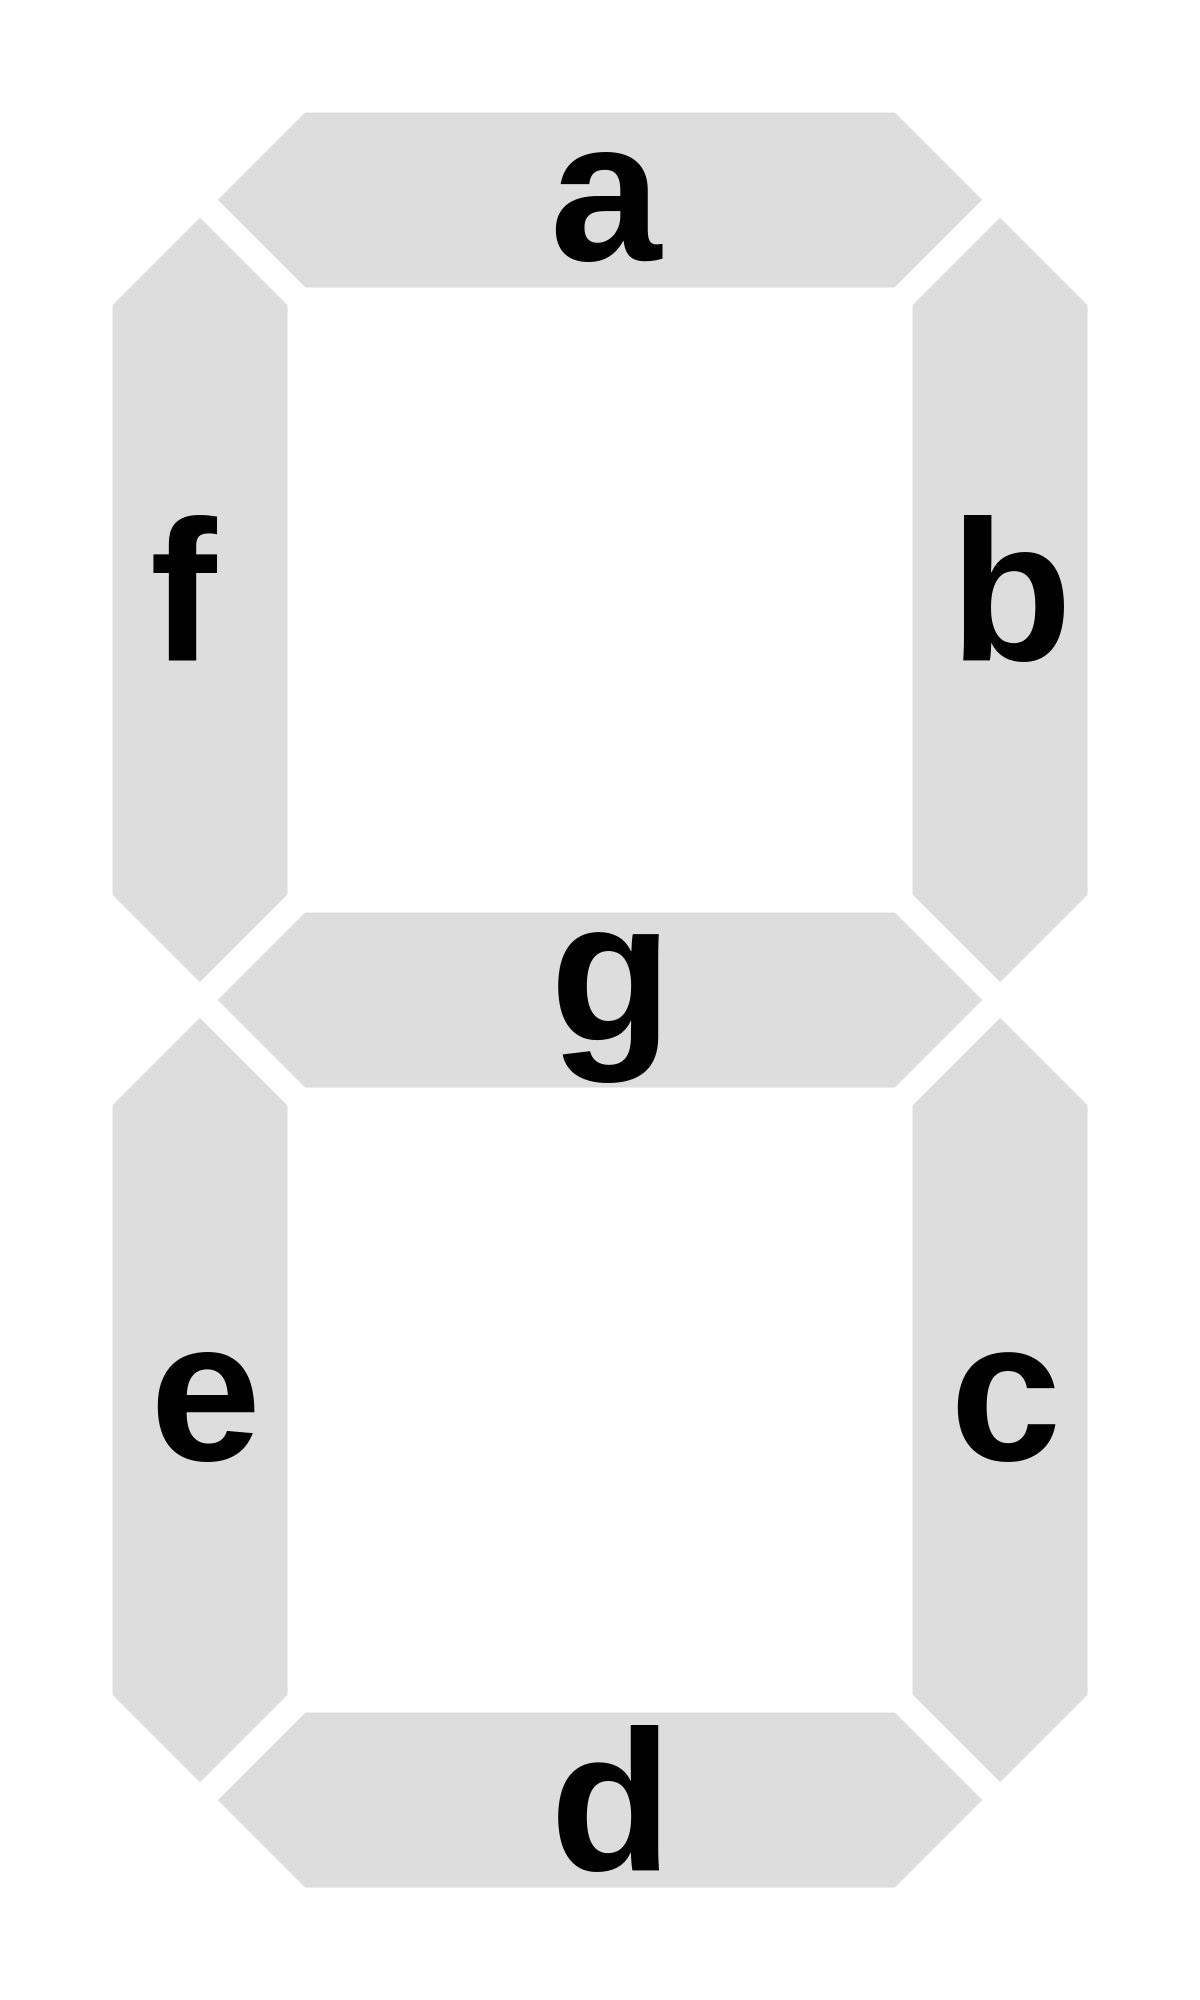
It can be described with a single object:
let model = { a: 0, b: 0, c: 0, d: 0, e: 0, f: 0, g: 0, h: 0 };
This model can theoretically represent all the states of the digit display. For example, to display one, this model would be:
{ a: 0, b: 1, c: 1, d: 0, e: 0, f: 0, g: 0, h: 0 };
Rendering
Now we need to find some way to display this model visually. It could have been a picture or a canvas.
For this project, it is a bunch of <div> elements positioned with some CSS:
function render(model) {
  const container = document.createElement("div");
  container.className = "sevenseg";

  Object.entries(model).forEach(([key, value]) => {
    const el = document.createElement("div");
    el.style.backgroundColor = value ? ON_COLOR : OFF_COLOR;
    el.className = "seg seg-" + key;
    container.appendChild(el);
  });
  return container;
}
The render method simply takes any model object and faithfully generates
a visual representation of it. Notice that it is a pure function. It has no
side effects. It doesn't affect the program in any way other than taking an
model as an input, doing some processing on it, and returning an output.
This separation is an incredible thing. We have cleverly avoided all kinds of complications
by having a pure render function that just renders whatever the system state is describing.
Now, changing the system model is a simple matter of changing the model and calling the render function
again.
function render(model) {
  const container = document.createElement("div");
  container.className = "sevenseg";

  Object.entries(model).forEach(([key, value]) => {
    const el = document.createElement("div");
    el.style.backgroundColor = value ? ON_COLOR : OFF_COLOR;
    el.className = "seg seg-" + key;
    el.onclick = () => present({ ...model, [key]: !model[key] });
    container.appendChild(el);
  });
  return container;
}

function present(model) {
  document.body.innerHTML = "";
  const view = render(model);
  document.body.appendChild(view);
}
Note that we have added an el.onclick function to each of the segment elements.
Each time a segment is clicked on, it toggles its associated key in the model, and
calls render again (via the present function). The present function
simply makes sure that each rendering overwrites the last one.
Serialization
Serialization here means just converting the digit as it is being viewed into the final byte representation that will be programmed into the display firmware.
The really cool thing about the Model-View separation is that one model can have multiple views. Conceptually, a serialized byte representation of the system model can also be considered a view. So it can be "rendered" as before, but onto a different "medium".
const KEY_ORDER = ["h", "g", "f", "e", "d", "c", "b", "a"];

function serialize(model) {
  let binaryString = "";
  for (const key of KEY_ORDER) {
    if (model.hasOwnProperty(key)) {
      const binaryValue = model[key] ? "1" : "0";
      binaryString += binaryValue;
    } else {
      binaryString += "0";
    }
  }
  // Convert binary string to hexadecimal
  const hexString = parseInt(binaryString, 2).toString(16).padStart(2, "0");
  return "0x" + hexString;
}
The KEY_ORDER constant is introduced because what binary bits map onto what LEDs is
hardware dependent.
Multiple displays
An easy way to support multiple displays is to compartmentalize all the data pertaining to a single display inside a class.
- js
- css
const ON_COLOR = "red";
const OFF_COLOR = "black";
const KEY_ORDER = ["h", "g", "f", "e", "d", "c", "b", "a"];
const EMPTY = { a: 0, b: 0, c: 0, d: 0, e: 0, f: 0, g: 0, h: 0 };

class SevenSeg {
  constructor(root) {
    this.root = $(root);
    this.model = { ...EMPTY };
    this.render();
  }

  render() {
    const container = document.createElement("div");
    container.className = "sevenseg";
    Object.entries(this.model).forEach(([key, value]) => {
      const el = document.createElement("div");
      el.style.backgroundColor = value ? ON_COLOR : OFF_COLOR;
      el.className = "seg seg-" + key;
      el.onclick = (() => {
        this.model[key] = !this.model[key];
        this.render();
      }).bind(this);
      container.appendChild(el);
    });
    this.root.innerHTML = "";
    this.root.appendChild(container);
  }

  serialize() {
    let binaryString = "";
    for (const key of KEY_ORDER) {
      if (this.model.hasOwnProperty(key)) {
        const binaryValue = this.model[key] ? "1" : "0";
        binaryString += binaryValue;
      } else {
        binaryString += "0";
      }
    }
    // Convert binary string to hexadecimal
    const hexString = parseInt(binaryString, 2).toString(16).padStart(2, "0");
    return "0x" + hexString;
  }
}
.container { display: flex; }

.sevenseg { width: 80px; position: relative; transform: skew(-7deg); margin-left: 20px; }
.segGroup { width: 120px; height: 190px; }

.seg { position: absolute; }
.sevenseg > .seg-a { top: 0px; left: 0px; height: 15px; width: 70px; }
.sevenseg > .seg-b { top: 0px; right: 0px; height: 70px; width: 15px; }
.sevenseg > .seg-c { top: 70px; right: 0px; height: 70px; width: 15px; }
.sevenseg > .seg-d { top: 140px; right: 0px; width: 70px; height: 15px; }
.sevenseg > .seg-e { top: 70px; left: 0px; height: 70px; width: 15px; }
.sevenseg > .seg-f { top: 0px; left: 0px; height: 70px; width: 15px; }
.sevenseg > .seg-g { top: 70px; right: 0px; width: 70px; height: 15px; }
.sevenseg > .seg-h { top: 140px; left: 90px; height: 15px; width: 15px; }
Now we can just create a new SevenSeg() per display.
const NUM_DISPLAYS = 6;
const $ = (x) => document.getElementById(x);
let frames = [];

function createNewSegmentGroup(frameIdentifier, frame = []) {
  const div = document.createElement("div");
  div.id = `container${frameIdentifier}`;
  div.className = "container";
  $("container").appendChild(div);
  let display = [];
  for (let j = 1; j <= NUM_DISPLAYS; j++) {
    const segContainer = document.createElement("div");
    segContainer.id = `c${frameIdentifier}a${j}`;
    segContainer.className = "segGroup";
    div.appendChild(segContainer);
    let seg = new SevenSeg(segContainer.id);
    if (frame[j - 1] !== undefined) seg.deserialize(frame[j - 1]);
    display.push(seg);
  }
  frames.push(display);
}
Why not React?
For simple and quick-use application like this, the abstractions of React feel clunky and unnecessary. Remember that React came into the scene to make complex web-apps simpler to manage. It didn't invent interactive web pages. And in any case, without an intuitive grasp of the system model, React wouldn't have been much help.